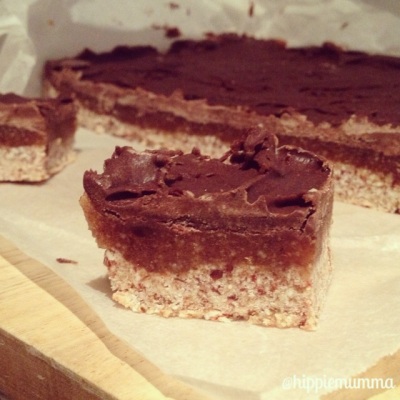
This slice is to die for! I posted it on Instagram and Facebook and got a lot of requests for the recipe so I just had to share. It’s so easy to make, and is actually healthy for you, even though you feel a little bit naughty when eating it. I was pleasantly surprised by how fudgey and, well.. caramel-y the caramel layer was. It turned out perfectly! The best thing is the tiniest piece is so rich and sweet (but not an over-whelming type sweet) that you really don’t need much and it lasts forever!
Raw Caramel Slice
For the base:
- 2 cups dessicated coconut
- 12 medjool dates, pitted
- 1 tsp water
Put all ingredients in a food processor and whizz until combined. It will take a few minutes to come together, don’t despair! Start with 10 dates and add a couple extra if needed. I ended up using 12 and a half this time, as 10 wasn’t enough to make the mixture sticky.
Once combined well, press firmly into a slice tin lined with baking paper. I used a 7″ x 7″ pan. One of my favourite tricks is to use another piece of baking paper to press the mixture down. That way it won’t stick to your hands or be lifted by a spatula/spoon.
Pop the tray into your freezer.
For the caramel:
- 1 cup macadamia nuts
- 1 cup tightly packed medjool dates, pitted
- 1/2 tsp vanilla
- 1/2 tsp water
Pulse the macadamias briefly. Add the rest of the ingredients and process until smooth. Be patient – it WILL become smooth! Remove the base from the freezer and spread it evenly on top. You can use a spatula, your fingers or another piece of baking paper to get an even coverage. Put it back in the freezer.
For the chocolate:
- 1/3 cup raw honey (maple syrup, rice malt syrup and agave should work fine too)
- 1/2 cup coconut oil, not melted
- 2 tbs raw cacao powder
Place all ingredients in your processor and whizz it until it’s smooth. Pour evenly over the top of your caramel layer and again put it back in your freezer. After an hour or so, it should be set enough to slice up.
You can keep this in the fridge or freezer but I leave mine in the freezer and take a piece out a couple minutes before eating – the consistency is just right!
You could use cocoa instead of cacao but remember cacao is so much better for you! You could even add a tablespoon of it to the base if you like things chocolaty. Using a liquid sweetener such as agave instead of honey will make this dessert vegan.
Leave me a comment if you give this recipe a go, I’d love to hear your feedback!


