Juicing

Months ago my juicer broke and I’ve been using one of those old school citrus juicers and having an orange, grapefruit and lime juice every morning before breakfast. Maybe once a week I’d buy a “proper” juice when out and about with O and the hubby… but it’s hard to spent $6.50 on a juice when I know I could make double the amount for half that price at home. 

We thought about buying a new juicer but it’s low on the “thing we need to buy” list. So I just made do without. Hubby being the fixer he is, tried to soak the metal mesh basket of my juicer in vinegar and bicarb.

It was pretty clogged with “juice junk”… you could barely see through it. Perhaps that’s why my juicer wasn’t working anymore? It was worth a try.

I should add, my juicer is about 8 years old. I’m sure it’s ready to retire, and secretly I want a slow/cold press juicer anyway (xmas is coming, right? I’ve already researched the Hurom juicer!). I But today I cracked out the juicer again and gave it a whirl. And while it’s still not performing 100%, it worked! 
Now I’m excited to go juice shopping again! Meaning, fruit and veg for my juices.
Today’s juice was made from the few things I have in my fridge… we really need to do a grocery shop. Plus, I was craving something sweet.

It had 2 carrots, 2 oranges, 2 green apples and 1 lemon. I juice green apples because they are lower in sugar compared to the red varieties and help to digest carbs. Winning!

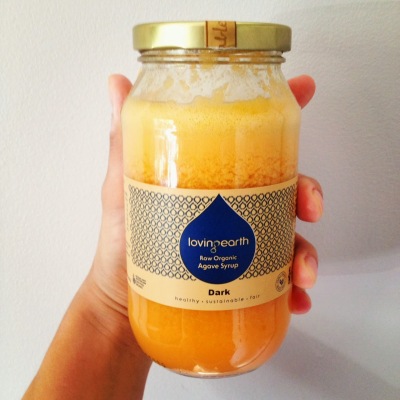
Hubby was going out for the day (apparently it’s something called work?) so I did another batch (2, 2, 2, 1) and put it in an old Loving Earth jar for him to take on the run.

It was delicious. And I have plenty of left over – it’s hard to pace myself with juices but I know it’s still full of sugars so I try my hardest to have just one big glass a day!

Tell me some of your favourite juice combos!

Raw Cheesecake Recipe

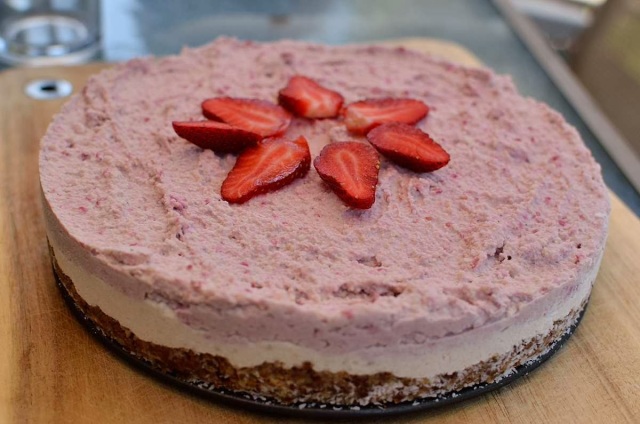
I hate cheesecake. I always have. But raw cheesecake… well I could eat that every day! It’s soooo good. And whats better is it’s actually good for you! And so easy to make even though it doesn’t look like it. I wanted to share this post now, because with the weather warming up (at least here in Oz!) it’s a great dessert to take to a backyard BBQ or to have stashed in your own freezer as a sneaky dessert at night.

There’s lots of raw cheesecake recipes floating around lately. I’ve adapted this one from here. Because who doesn’t love berries? You can easily leave the berries out if you want though.
Raw Cheesecake
For the base:
  • 3 cups macadamia nuts or peacans (I’ve tried both with happy results)
  • 1 1/2 cups medjool dates, pitted
In a springform pan lightly spray some coconut oil on the base and then sprinkle a layer of desiccated coconut over it. This will prevent the crust from sticking.
In your food processor, combine the base ingredients well. You may need to add an extra date or two. 
Press the mixture down firmly into your tin and then pop it in the freezer.
For the filling:
  • 3 cups cashews, soaked for 2-3 hours in filtered water
  • 3/4 cup lemon juice
  • 3/4 cup raw honey or agave
  • 3/4 cup coconut oil
  • 1/2 cup water
  • 1 tsp vanilla essence
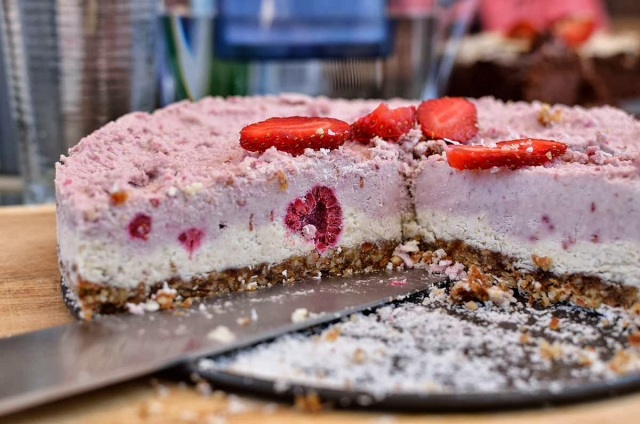
Combine all the ingredients in your food processor and blend until smooth. Adjust to taste (I often put some more lemon juice in). Pour half or 3/4 of the mixture over the top of your base and tap the pan on the bench to remove air bubbles. 
Place some frozen raspberries in the mixture… just gently press them in with your finger.
Add a handful of frozen berries to the remaining filling in your food processor and blend until the berries are combined. Pour this over the top of the plain filling and then place the cheesecake into your freezer carefully.
Leave it in your freezer until it’s firm… at least 4 hours. You can remove it from the pan once it’s frozen and slice it. I keep mine in the freezer and take a piece out onto the bench top 30 minutes before eating it. If you had this for a party, I’d recommend taking it from the freezer to your fridge about 3 hours before you want to eat it!
You could also make a raspberry sauce up to drizzle over it before serving by blending some dates and berries together. I usually just top it with some berries and maybe a drizzle of agave. Options for this cake are endless!

It’s not the cheapest of cakes to make but it does last quite a while, as it’s kept frozen, and it’s large!
I want to take this cake to someones house and see if they notice that it’s not a “real” cheesecake… that would be fun 😉

Raw Caramel Slice

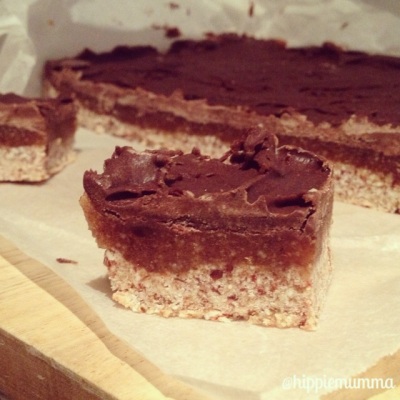
This slice is to die for! I posted it on Instagram and Facebook and got a lot of requests for the recipe so I just had to share. It’s so easy to make, and is actually healthy for you, even though you feel a little bit naughty when eating it. I was pleasantly surprised by how fudgey and, well.. caramel-y the caramel layer was. It turned out perfectly! The best thing is the tiniest piece is so rich and sweet (but not an over-whelming type sweet) that you really don’t need much and it lasts forever!


Raw Caramel Slice

For the base:

  • 2 cups dessicated coconut
  • 12 medjool dates, pitted
  • 1 tsp water
Put all ingredients in a food processor and whizz until combined. It will take a few minutes to come together, don’t despair! Start with 10 dates and add a couple extra if needed. I ended up using 12 and a half this time, as 10 wasn’t enough to make the mixture sticky.
Once combined well, press firmly into a slice tin lined with baking paper. I used a 7″ x 7″ pan. One of my favourite tricks is to use another piece of baking paper to press the mixture down. That way it won’t stick to your hands or be lifted by a spatula/spoon.
Pop the tray into your freezer.
For the caramel:
  • 1 cup macadamia nuts
  • 1 cup tightly packed medjool dates, pitted
  • 1/2 tsp vanilla
  • 1/2 tsp water
Pulse the macadamias briefly. Add the rest of the ingredients and process until smooth. Be patient – it WILL become smooth! Remove the base from the freezer and spread it evenly on top. You can use a spatula, your fingers or another piece of baking paper to get an even coverage. Put it back in the freezer.
For the chocolate:
  • 1/3 cup raw honey (maple syrup, rice malt syrup and agave should work fine too)
  • 1/2 cup coconut oil, not melted
  • 2 tbs raw cacao powder
Place all ingredients in your processor and whizz it until it’s smooth. Pour evenly over the top of your caramel layer and again put it back in your freezer. After an hour or so, it should be set enough to slice up.
You can keep this in the fridge or freezer but I leave mine in the freezer and take a piece out a couple minutes before eating – the consistency is just right! 
You could use cocoa instead of cacao but remember cacao is so much better for you! You could even add a tablespoon of it to the base if you like things chocolaty. Using a liquid sweetener such as agave instead of honey will make this dessert vegan. 
Leave me a comment if you give this recipe a go, I’d love to hear your feedback!

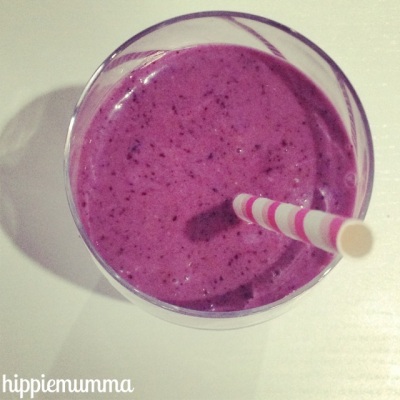
Blueberry & Banana Smoothie

Some mornings (or really any time of the day) I just can’t be bothered to create a meal. I can’t be bothered to think and I can’t be bothered to spend lots of time in the kitchen. And I can’t be bothered I don’t have the time to sit down and eat a meal let alone scratch my arm sometimes (ah, children). 
My solution on these types of days is this: SMOOTHIE! There’s always some spare vegies or frozen fruit in our house, and experimenting is half the fun. This one is full of antioxidants and is very filling! A great breakfast smoothie to get you going for the day.
Blueberry & Banana Smoothie
1 banana, fresh or frozen
1 cup of frozen blueberries
1/4 cup coconut water
1 tbs chia seeds
1 tbs flax meal
1 tsp agave or raw honey
Blend all ingredients thoroughly. Enjoy immediately (chia turns to a pudding!).

Cacao Nut Slice

This recipe isn’t my own. I’m not sure where it’s come from and who to credit, as my mum once emailed it to me and I’ve been making it every fortnight since! She still makes it regularly too as it’s such a healthy and delicious snack for at home or on the go. It’s kind of like a healthy crunchy muesli bar. It’s a staple snack in our house.
DISCLAIMER! The recipe below contains sugar. I know, I know… smack me on the wrist 😉 I’ve eliminated so much sugar from my diet that I really don’t panic about having 1/2 cup of it in this whole recipe. The slice takes about 2 weeks to eat so if I wanted to justify it, I could get my maths cap on and work out the tiny amount of sugar I’m consuming each day by eating one piece. But, I don’t care. It’s full of healthy nuts and seeds, and the carob and cacao powder pack a punch of nutrients and essential vitamins and minerals too. I eat cacao every day, and you should too! So here is another way to get it into you.
Cacao Nut Slice
  • 1 cup desiccated coconut
  • 1 cup rolled oats
  • 1/2 cup cashews, chopped
  • 1/2 cup almonds, chopped
  • 1/2 cup macadamias, chopped
  • 1/2 cup sunflower seeds
  • 1/2 cup pumpkin seeds
  • 1/2 cup sesame seeds
  • 3/4 cup dried cranberries*
  • 1/2 cup raw cacao powder
  • 1/4 cup carob powder
  • 1/2 cup raw honey
  • 1/2 cup raw sugar*
  • 125g butter*
Line a lamington pan with baking paper.
Combine all but the last 3 ingredients in a bowl. 
Place honey, sugar and butter in a medium saucepan and stir over heat until boiling. Simmer, and stir occasionally for 5 minutes. Pour it over the dry mix and combine well. Press mixture into the pan and bake at 180C for about 20 minutes or until browned. Let it cool in the pan before slicing into squares, rectangles, whatever shape you want!
Store in an airtight container in your cupboard. 
* Notes:
You can use sultanas instead of cranberries if you’re on a budget.
You could try using coconut sugar, but I’m yet to test this.
I use Nuttelex instead of butter as I’m dairy free, and sometimes I use half Nuttelex and half coconut oil. I’m not game enough to try 125g of coconut oil, as I’m suspicious it may make the slice too sloppy and fall apart. If you try it, let me know!
If you don’t have cacao and carob powder, you could use 3/4 cup of Milo as that’s what the original recipe calls for.

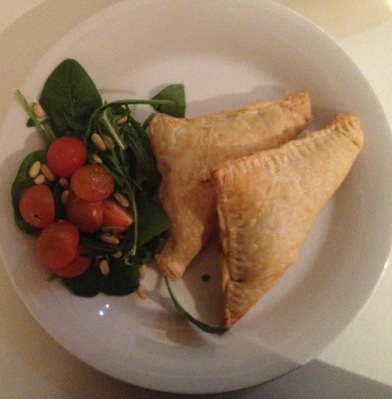
Easy Peasy Samosas

I love it when my husband tells me “This is good, I like this! It’s a keeper.” at dinner time. The first thing I do is print off the recipe and shove it in my folder I keep in the kitchen because it’s good to have that meal where you know you’ll please everyone! It doesn’t happen for every meal I’ve created and placed in front of him but hey, at least he is honest!

One of his favourite meals is samosas. They are so easy to do and a good way of getting your vegetables in. O loves them too, which is always a bonus because getting multiple dinners ready is hard when they aren’t all the same! This has been a fortnightly meal in winter because it’s one of those cozy hot foods that are comforting… like soup, you know? And we always get leftovers for lunch the next day.
I posted the picture of them on Instagram last night and had lots of positive feedback and recipe requests.
So here it is!
Easy Peasy Samosas
  • 2 tbs balti paste
  • 1/4 cup coconut milk
  • 500g vegetables (diced small, frozen or fresh)
  • 2 sheets puff pastry
Pre-heat oven to 170C.
Heat a large non-stick frying pan on medium and add the balti paste without oil, and stir for 30 seconds until it becomes fragrant. Add the coconut milk and stir until combined. I have to use the back of my wooden spoon to stop the paste going lumpy in the milk. Once it’s thickened a bit, add the diced vegetables. Coat the vegies in the sauce and let it cook for 5-10 minutes, but stir it often. Take it off the heat and thaw your puff pastry sheets. I cut mine into four small squares but it’s up to you!
With a pastry brush, brush some water along the edges of the pastry. Spoon some of the mixture into the center of the pastry and fold over. Seal the edges with a fork, or pinch with your fingers. Brush the whole samosa with a bit more water and you can even sprinkle some sesame or poppy seeds on top.
Pop them in the oven for 20-30 minutes. 
And that’s it!
Serve with a side salad, of course 🙂
I think any type of paste will work… tandoori, korma etc. I haven’t strayed from balti but might have to now that Coles has stopped stocking it (and 101 other things). Or I could learn to make my own.
You could also buy vegan pastry sheets if you wanted to.

A Different Take On Jam

I love toast. I love jam on my toast. I love jam on lots of things. Even just jam out of the jar! But the jam you buy in the supermarket is full of sugar. And preservatives. And other things you don’t need in your body. And the jam you might find that doesn’t contain all those nasties are so expensive.

One day I made my own jam and I was very skeptical, because this wasn’t your usual preserve jam. No, this was jam made from chia seeds. I give O chia seeds soaked in water or almond milk for breakfast every morning, so I know it goes a great jelly like consistency. And it’s often used as a binder and egg replacer in vegan recipes. So it made sense to work as a jam but I just wasn’t sold.

And then I ate it. SOLD. I eat it from the jar with a spoon while watching TV at night. It’s that good. I love it!

I came across quite a few recipes like the one I’m about to post. This one is my own, but they’re really all the same and it’s so versatile. You can add anything you want, and have some fun experimenting!

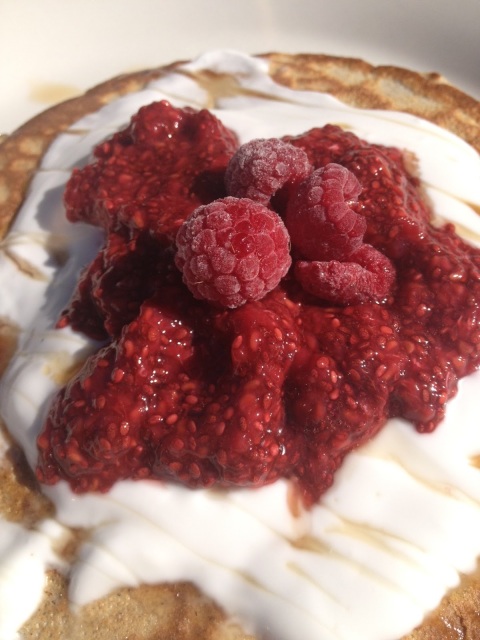
Raspberry Chia Jam

500g frozen raspberries (defrosted), or fresh berries
1/4 cup sugar
1/2 cup chia seeds
1 tbs lemon juice

Mash your berries. I used a potato masher but I suppose you could also throw them in the blender. I like my jam a little chunky though so I don’t over mash! Stir in the sugar. I used coconut sugar which is like brown sugar but unrefined and is a low GI sugar. Add the lemon juice and then stir through the chia seeds. Make sure it’s all combined nicely. Pop the mixture into a air tight jar and leave it in the fridge overnight. It’ll be perfect for your toast or pancakes in the morning! It’ll last about 3 weeks in the fridge.

You could use any berry but I haven’t tried anything other than raspberries yet. You could do mixed berries, blueberry, blackberries etc. You could also add some orange peel, or maybe some vanilla essence. Maybe even some mint.

Let me know if you try this or come up with any variations!

The Best Muesli Ever

I’m a big breakfast person. I look forward to it the moment I wake up. Heck, I look forward to it when I go to bed! I’ve always been a breakfast lover. And to be more precise, I’ve always been a cereal lover. Growing up, breakfast was cereal with fruit and milk. And a sprinkling of sugar. Usually we mixed our cereals (one “good” and one bad type) and the fruit was either strawberries, banana, or tinned peaches and pears. I still cannot eat cereal without fruit on top! When I met my husband he thought I was weird for mixing cereals let alone adding fruit! Now he loves it himself 😉

When I went off dairy and gluten and all that jazz, I started forking out at least $7 for a small box of cereal. I had no choice! Then I thought Why not make my own? It couldn’t be that hard…
And it’s not. I promise.

Now I’d never go back. I now know what’s in my cereal (healthy, nourishing ingredients) and NOT in my cereal (colourings, additives & preservatives). I can add and customize it every time I make it too, it’s great! I haven’t worked out the cost but I’d be interested to see the difference.

This recipe can be so versatile. You can use different nuts, add some berries, or maybe some orange peel? I usually eyeball the amounts but I made a batch yesterday and tried to measure so I could write out a recipe to share on my blog.

The Best Muesli Ever

  • 1 cup almonds, chopped
  • 1/2 cup sunflower seeds
  • 1/4 cup & 2 tbs pepitas
  • 1/2 cup almond meal
  • 1 & 1/3 cup shredded coconut
  • 1 & 1/2 tsp cinnamon
  • 1/4 cup raw honey
  • 3 tbs coconut oil
  • 1 tsp vanilla essence
  • 3/4 cup sultanas (or goji berries, cranberries, white mulberries…)
  • 3/4 cup oats
  • 1 cup puffed millet
Combine, melt, bake!
Preheat the oven to 160C.
Combine the first part of the ingredients in a large mixing bowl. 

In a small saucepan, slowly melt the honey and coconut oil and stir so they are combined. Once runny and smooth, remove from the heat and pour it over the dry ingredients. Add the vanilla essence. Stir and make sure it’s all coated evenly. Spread the mixture onto lined baking trays and pop into the oven for about 15 minutes. Bring it out, stir and move it around the tray and put it back in for another 10 minutes.
Add the third part of the ingredients and combine well. 
Once it’s cooled, store in an air tight container! 
You could use the oats in the first part of the ingredients but I prefer my oats raw (more nutritional value!) and you might have to add more liquid if you do that. The puffed millet is used for a bit of a “filler”. It makes it go further.
I double the above recipe. Depends how often you eat cereal and how many of you will be eating it! It never stays around long enough here to know when it starts going yuck. And of course, I always top mine with some fresh fruit and almond milk.
Tell me about your typical breakfast! I would love you to leave me a comment if you try this recipe.