{RECIPE} Grape & Prosciutto Crostini

We were at my parents house a couple of weeks ago and I was flicking through an Aldi catalog and came across a recipe on the back page. Being Italian, I loved it straight away… it had prosciutto! I wanted to make it ASAP! We don’t get catalogs where we live so my Mum kindly gave it to me to take home.
The Hubby was hesitant, mainly about the grapes. But while Olivia napped I made this for lunch. And it was really tasty! The grapes were a nice cold and sweet hit, it worked really well. The Hubby loved it and I’ll be making it again for sure. After a few people saw it on IG and FB they asked for the recipe, so here it is…
 photo photo3-5.jpg
Image is my own.


Grape & Prosciutto Crostini
Ingredients

1/2 cup small red and white grapes, halved
80g goats feta
6 thin slices of  Prosciutto
½ cup rocket leaves
1 tbsp Balsamic Vinegar
1 ½ tbsp Extra Virgin Olive Oil
½ tbsp Honey
1 loaf of Pane Di Casa, sliced

Method

Brush bread slices with olive oil on both sides and toast in a frypan on medium heat. Gently press slices with a spatula. Flip and repeat once bread is crisp/golden and transfer to a platter.

Lightly whisk balsamic vinegar, olive oil, honey and salt and pepper to taste to make honey balsamic dressing. Set aside.

Slice each prosciutto piece into two long strips and place one strip on each grilled bread slice. Top with crumbled goats cheese, a few rocket leaves and sprinkle with the halved red and white grapes. Drizzle each slice with the dressing and serve immediately.

Again, I do not take credit for this recipe. You can find the original recipe here.

{RECIPE} Cheats Pizza

Normally I would make a pizza base from scratch (next on the list is a cauliflower base) or at least use an actual base from the freezer department designed for pizza making. But… I’m human too. Shock horror, I know. I’ve been tired and run down lately (as my last whingey entry told) so I whipped up a cheats pizza for dinner last night.
To me, making a pizza from home is pretty basic, especially when using a prepared base. But I’m hopeful someone will find this inspiring or helpful.
 photo photo1-2.jpg
 photo photo3-4.jpg
Cheats Pizza
Wholegrain wraps (or spelt, white, whatever you like)
Sauce base (I used pesto. Other options are pizza/tomato sauce, BBQ, garlic sauce)
Veggies (for mine I used pumpkin, pineapple, capsicum, mushroom, red onion and pine nuts)
Quality melting cheese (I always use Bocconcini)
Preheat your oven to 180C and line a tray with baking paper.
Chop up your veggies to desired sizes and shapes. If you’re using something like pumpkin or sweet potato, pop them in the oven while you’re making the rest of your pizza.
Place your wraps on the tray and spread with whatever base you want (pesto, BBQ…).
Arrange veggies on your base. Shred or slice your cheese (try not to go overboard, most people do!) and arrange on the pizza.
Pop it all in the oven for 15 minutes or until cheese is melted and base is crispy. Slice it up and enjoy!
 photo photo4-2.jpg
Other toppings I often use: baby artichokes, pine nuts, olives, sun-dried tomatoes, fresh tomato, avo (after cooking), prosciutto (my favourite, but naughty!), fresh herbs, rocket (love this fresh as a topping after the oven).
The options are endless. Have fun experimenting with what flavours compliment each other. I’ve found minimal is key.

Very Tired

I’m tired. Very tired. Olivia has tooth #7 coming through and therefore is not sleeping very well. Which means not only am I tired but I’m also sore because she insists on breast feeding all night. So I have nothing interesting to post today. So here is a load of recent pictures of my adventures in the kitchen.

 photo photo213-1.jpg

 photo photo2-2.png

 photo photo45.jpg

 photo photo311.jpg

 photo photo33.jpg

1. Tropical style smoothies are my go-to lunch right now with the heat being in the 30’s and 40’s. This one is topped with coconut and bee pollen. Easy to whack it all in the blender and tastes amazing. If only I was on a tropical island to match.

2. Was going to make a lemon meringue. Decided to give a clean recipe from IG a whirl and made a lemon tart instead. Tastes exactly the same as the lemon meringue (minus the meringue obviously) but the consistency wasn’t very pleasing – it was like half dried glue or as the Hubby said, “snot”. Delightful.

3. Scored punnets of strawberries for 99c each over the weekend. They were end-of-life quality so after making a smoothie, feeding them to the kid and having them on my breakfast cereal, I made this Strawberry Jalousie (recipe on my Instagram).

4. As mentioned above, the strawbs needed to be used, so in this smoothie went a big handful of them along with some blueberries, baby spinach, banana, black sesame seeds, coyo, bee pollen, maca powder and almond milk. Breakfast is served.

5. Healthy and “clean” flourless chocolate muffins via Teresa Cutter. I used raw cacao instead of cocoa powder which made it taste pretty bitter. Next time I’ll have to add more sweetener (agave, maple syrup etc). The recipe is here.

{RECIPE} Capsicum & Nut Dip

 photo photo114.jpg
Today I’m sharing the recipe for a delicious dip I made yesterday. It’s healthy and suitable for vegans, kids… everyone! I’ve had many comments on Instagram asking what nutritional yeast is. It’s great for vegetarians and has plenty of vitamins in it such as B vitamins, folic acid, selenium, zinc, and protein. It’s low in fat and often gluten free. It has a cheesy flavour so is often a staple in a vegan’s home. Olivia has air-popped popcorn with a drizzle of good quality olive oil  and a sprinkle of nutritional yeast on it every day. It’s her favourite snack and I’m okay with that because it’s pretty healthy!

Why do I love this dip? It’s easy and quick to throw together. It took me less than 5 minutes to pop it in my Cuisinart, blitz it smooth and transfer to a glass jar. And I usually have all the ingredients in my kitchen at any notice.
 photo photo310.jpg

 You’re going to need:
  • 1 cup pine nuts 
  • 1 cup cashews 
  • 2 cloves garlic 
  • 1 red capsicum 
  • 1 lemon, juiced 
  • ½ cup ACV 
  • ½ cup nutritional yeast/savoury yeast
  •  Pinch salt 
  • Water for desired consistency (I use none)

Blend all ingredients in food processor or blender.
Store the dip in an airtight container in the refrigerator for up to 3 weeks.

 photo photo215.jpg

I usually only make half the amount which is perfect for one person over a week or two. I also do a little less ACV than listed as I find it too overpowering. You can smear it on some bread, or use it as a dip for some crackers, or veggie sticks.
Tip: you could use salted cashews instead of a pinch of salt.
Not sure who to credit with the recipe as my Mum sent it to me in a Word Document a couple years ago. Hope you enjoy it, maybe it’ll be your go-to dip to take to your next BBQ!

New Salad Love

Recently, my mum and I went halves in purchasing The Green Kitchen, a vegetarian recipe book full of beautiful photos and nutritious and easy recipes. It’s written by David Frenkiel and Luise Vindahl, who live in Stokholm and they have an adorable little girl called Elsa.

One of the first things I recreated from the book was the Broccoli Salad with Pomegranate and Raisins. I followed it word for word and it’s now one of my favourite salads. I’d never eaten pomegranate before (although I’d had the juice, but always mixed with something else) so wasn’t sure what to expect.

Some people struggle with eating broccoli  raw but it’s really crunchy and nice! It’s a really refreshing salad, and I can see us making it often, with the warmer summer months ahead.

So here I share the recipe with you. I recommend you purchase the book (or even have a squiz  in your local library) for more delicious recipes! And check out their blog here.

Raw Broccoli Salad with Pomegranate and Raisins
You’ll need:
  • 2 heads of fresh broccoli
  • 1 small red onion, finely chopped
  • arils from 1 pomegranate\
  • 1 1/4 cup raisins
  • generous 1/2 cup sunflower seeds, toasted
  • 1 cup plain yoghurt
  • 1/2 tsp sea salt
  • freshly ground black pepper
Separate the broccoli florets from the stalk and cut them into smaller bit sized pieces. The book says to slice the remaining stalk and use that as well but the hubby said no way. Place it in a serving bowl with the onion, pomegranate raisins and sunflower seeds. Toss to combine. Add the yoghurt, salt and pepper to taste, and then using your hands, mix the yoghurt through everything, making sure to coat all the broccoli florets. 
Ta-da! Dig in.
It’s a seriously different but beautiful salad.
Give it a go and tell me if you like it!

Finally Friends With Egg

Photo from “A Nourishing Kitchen” e-book.
*This is NOT a sponsored post.
Many months ago I came across an account of Instagram called The Holistic Ingredient. The wonderful lady behind it, Amy Crawford, also has a website and Facebook page under the same name and has published an e-book called “A Nourishing Kitchen”. I purchased it the day I came across it and have used it weekly in my meal planning, for breakfast, lunch, dinner and even snacks. Most of it is dairy, sugar and gluten free or has the option to be. It’s all clean, nourishing and (most importantly) freaking delicious. 

Today I came home around lunch time and almost reached for the unhealthy box of Milo cereal hubby has on top of the fridge.

I was hungry, O hadn’t had a morning nap (read: devil child) and I had limited time to get something ready for lunch. Magically, I convinced myself to re-consider my options and I opened up the Nourishing Kitchen e-book and decided to give the Sweet Omelette a go.

Fact: I’ve always hated eggs. I know how good they are for you, but I could just never enjoy them, no matter how they were cooked. Anywho, I whipped 2 eggies up, following the recipe, and wouldn’t you know… I ACTUALLY ENJOYED IT. This is definitely one way I can get in my eggs every week.
You’ll need:
  • 2 eggs
  • 1 tbs pure maple syup
  • 1 tsp cinnamon
  • couple drops vanilla essence
I used my cake beaters to get all of the above ingredients nice and fluffy. If you’re strapped for time, just whisk away vigorously for a bit. It’ll still work. Pour the mixture into an omelette pan. I used a bit of coconut oil in mine. I then watched Jamie Oliver make an omelette on Youtube… because being an egg-hater and omelette virgin, I had no idea what I was doing.
Once it was cooked, I added some plain CoYo and my raw berry chia jam. It was amazing. Even my grumpy 1 year old enjoyed it (she is more into savory than sweet).
Try this recipe, especially if you hate eggs like me!

You can purchase the e-book here.

Beetroot & Ginger Juice

So, you know how I said my juicer was broken, then my wonderful hubster fixed it? It’s still broken. And we just bought some lovely fruit and veg for juicing. Of course. Anyway, I managed to juice one lot up before I gave up on the bloody thing.

I needed a decent juice. This long weekend has been pretty unhealthy for me. We celebrated O’s first birthday with a party on Saturday. I can’t even remember what happened yesterday (can you tell I’m tired?). But let me tell you, when you’re so used to eating “clean” and no sugar, dairy and minimal gluten, having a day or 2 of gorging on shit can really mess you around!

Sugar really affected me. I felt it almost instantly. And dairy affected Olivia (she is still letting some rippers go!). I was actually looking forward to eating like normal again once the party was over. And I love being able to say this is now our normal! It’s great to be able to see how crap I really felt though, it reassures me I’m definitely on the right path.

I thought I’d take a pic and share this juice with you. I know I’m always looking for new combination ideas!
This one has…
  • 1 beetroot (medium size!)
  • 1 carrot
  • 2 small oranges
  • 1 green apple
  • ginger

I added the green apple after the above picture was taken, obviously. I’m smart like that. I like my ginger to give my juices a decent kick so I added a fair bit. Especially when I’m juicing things like beetroot. I hate beetroot. So why are you juicing it?! Because I know it’s good for me! Huzzah!

Juicing

Months ago my juicer broke and I’ve been using one of those old school citrus juicers and having an orange, grapefruit and lime juice every morning before breakfast. Maybe once a week I’d buy a “proper” juice when out and about with O and the hubby… but it’s hard to spent $6.50 on a juice when I know I could make double the amount for half that price at home. 

We thought about buying a new juicer but it’s low on the “thing we need to buy” list. So I just made do without. Hubby being the fixer he is, tried to soak the metal mesh basket of my juicer in vinegar and bicarb.

It was pretty clogged with “juice junk”… you could barely see through it. Perhaps that’s why my juicer wasn’t working anymore? It was worth a try.

I should add, my juicer is about 8 years old. I’m sure it’s ready to retire, and secretly I want a slow/cold press juicer anyway (xmas is coming, right? I’ve already researched the Hurom juicer!). I But today I cracked out the juicer again and gave it a whirl. And while it’s still not performing 100%, it worked! 
Now I’m excited to go juice shopping again! Meaning, fruit and veg for my juices.
Today’s juice was made from the few things I have in my fridge… we really need to do a grocery shop. Plus, I was craving something sweet.

It had 2 carrots, 2 oranges, 2 green apples and 1 lemon. I juice green apples because they are lower in sugar compared to the red varieties and help to digest carbs. Winning!

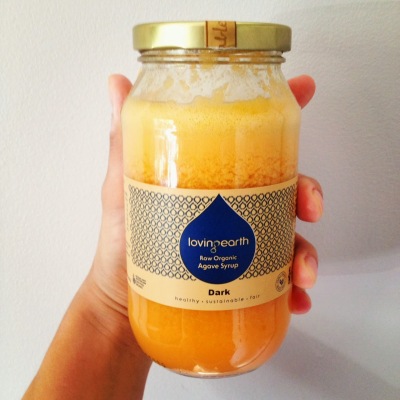
Hubby was going out for the day (apparently it’s something called work?) so I did another batch (2, 2, 2, 1) and put it in an old Loving Earth jar for him to take on the run.

It was delicious. And I have plenty of left over – it’s hard to pace myself with juices but I know it’s still full of sugars so I try my hardest to have just one big glass a day!

Tell me some of your favourite juice combos!

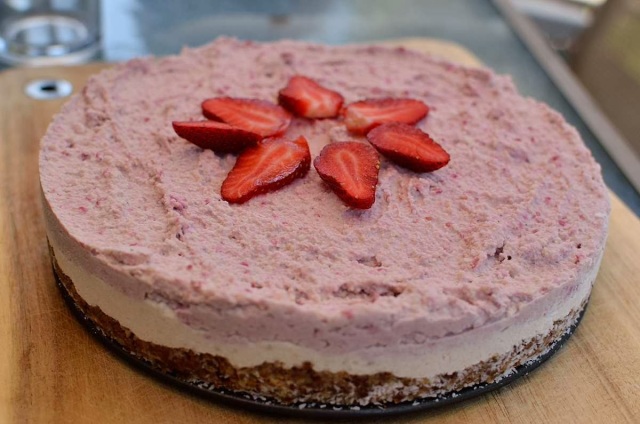
Raw Cheesecake Recipe

I hate cheesecake. I always have. But raw cheesecake… well I could eat that every day! It’s soooo good. And whats better is it’s actually good for you! And so easy to make even though it doesn’t look like it. I wanted to share this post now, because with the weather warming up (at least here in Oz!) it’s a great dessert to take to a backyard BBQ or to have stashed in your own freezer as a sneaky dessert at night.

There’s lots of raw cheesecake recipes floating around lately. I’ve adapted this one from here. Because who doesn’t love berries? You can easily leave the berries out if you want though.
Raw Cheesecake
For the base:
  • 3 cups macadamia nuts or peacans (I’ve tried both with happy results)
  • 1 1/2 cups medjool dates, pitted
In a springform pan lightly spray some coconut oil on the base and then sprinkle a layer of desiccated coconut over it. This will prevent the crust from sticking.
In your food processor, combine the base ingredients well. You may need to add an extra date or two. 
Press the mixture down firmly into your tin and then pop it in the freezer.
For the filling:
  • 3 cups cashews, soaked for 2-3 hours in filtered water
  • 3/4 cup lemon juice
  • 3/4 cup raw honey or agave
  • 3/4 cup coconut oil
  • 1/2 cup water
  • 1 tsp vanilla essence
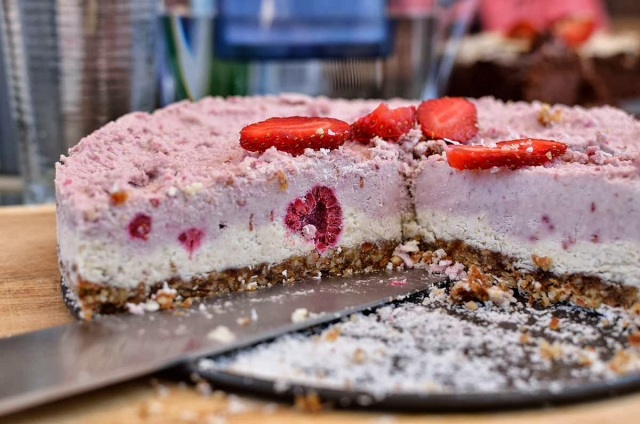
Combine all the ingredients in your food processor and blend until smooth. Adjust to taste (I often put some more lemon juice in). Pour half or 3/4 of the mixture over the top of your base and tap the pan on the bench to remove air bubbles. 
Place some frozen raspberries in the mixture… just gently press them in with your finger.
Add a handful of frozen berries to the remaining filling in your food processor and blend until the berries are combined. Pour this over the top of the plain filling and then place the cheesecake into your freezer carefully.
Leave it in your freezer until it’s firm… at least 4 hours. You can remove it from the pan once it’s frozen and slice it. I keep mine in the freezer and take a piece out onto the bench top 30 minutes before eating it. If you had this for a party, I’d recommend taking it from the freezer to your fridge about 3 hours before you want to eat it!
You could also make a raspberry sauce up to drizzle over it before serving by blending some dates and berries together. I usually just top it with some berries and maybe a drizzle of agave. Options for this cake are endless!

It’s not the cheapest of cakes to make but it does last quite a while, as it’s kept frozen, and it’s large!
I want to take this cake to someones house and see if they notice that it’s not a “real” cheesecake… that would be fun 😉

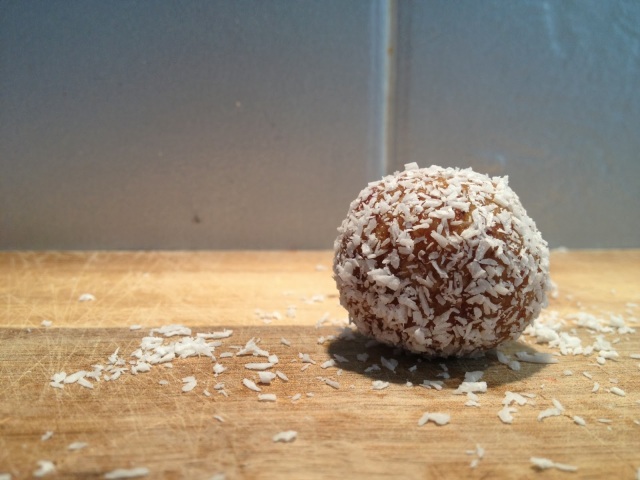
Raw Apricot Bliss Balls


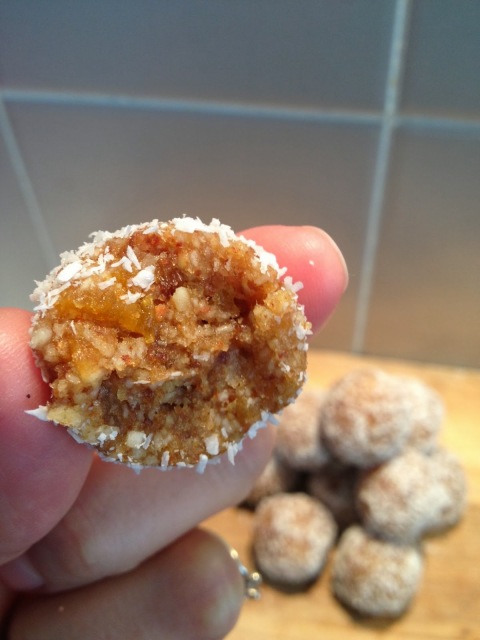
One day I really felt like apricots. But in a delicious snack form, preferably with coconut. I put my thinking cap on and this recipe came about. Hubby has declared them the best ever bliss balls I’ve made (and I’ve got quite a few in my recipe folder!).
 
You will need:
  • 1 cup of almonds (I’ve also used macadamias with success)
  • 1 cup of shredded coconut
  • 10-12 medjool dates, pitted
  • 1/2 tsp vanilla or almond essence
  • 2 tbs water
  • 1 tbs coconut oil, melted
  • 1/4 cup (or more!) of dried apricots
Then do this:
Process the nuts and coconut in your food processor until reasonably fine but still a little crumbly.
Add the rest of the ingredients except the last ingredient. Process until a dough forms. Start with 10 dates but add more if the consistency isn’t doughy enough.
Add the apricots and pulse until combined. If you over-process it you won’t have chunks of apricot in your bliss balls and it’s just not the same 😉
Roll into balls with your hands. I get about 20-30 balls but it depends on the size you make them. 
I then roll them through desiccated coconut. Crushed nuts would be nice instead. This step is entirely optional though.
Refrigerate for a couple of hours before consuming, and keep stored in the fridge in an air tight container.
Yum!